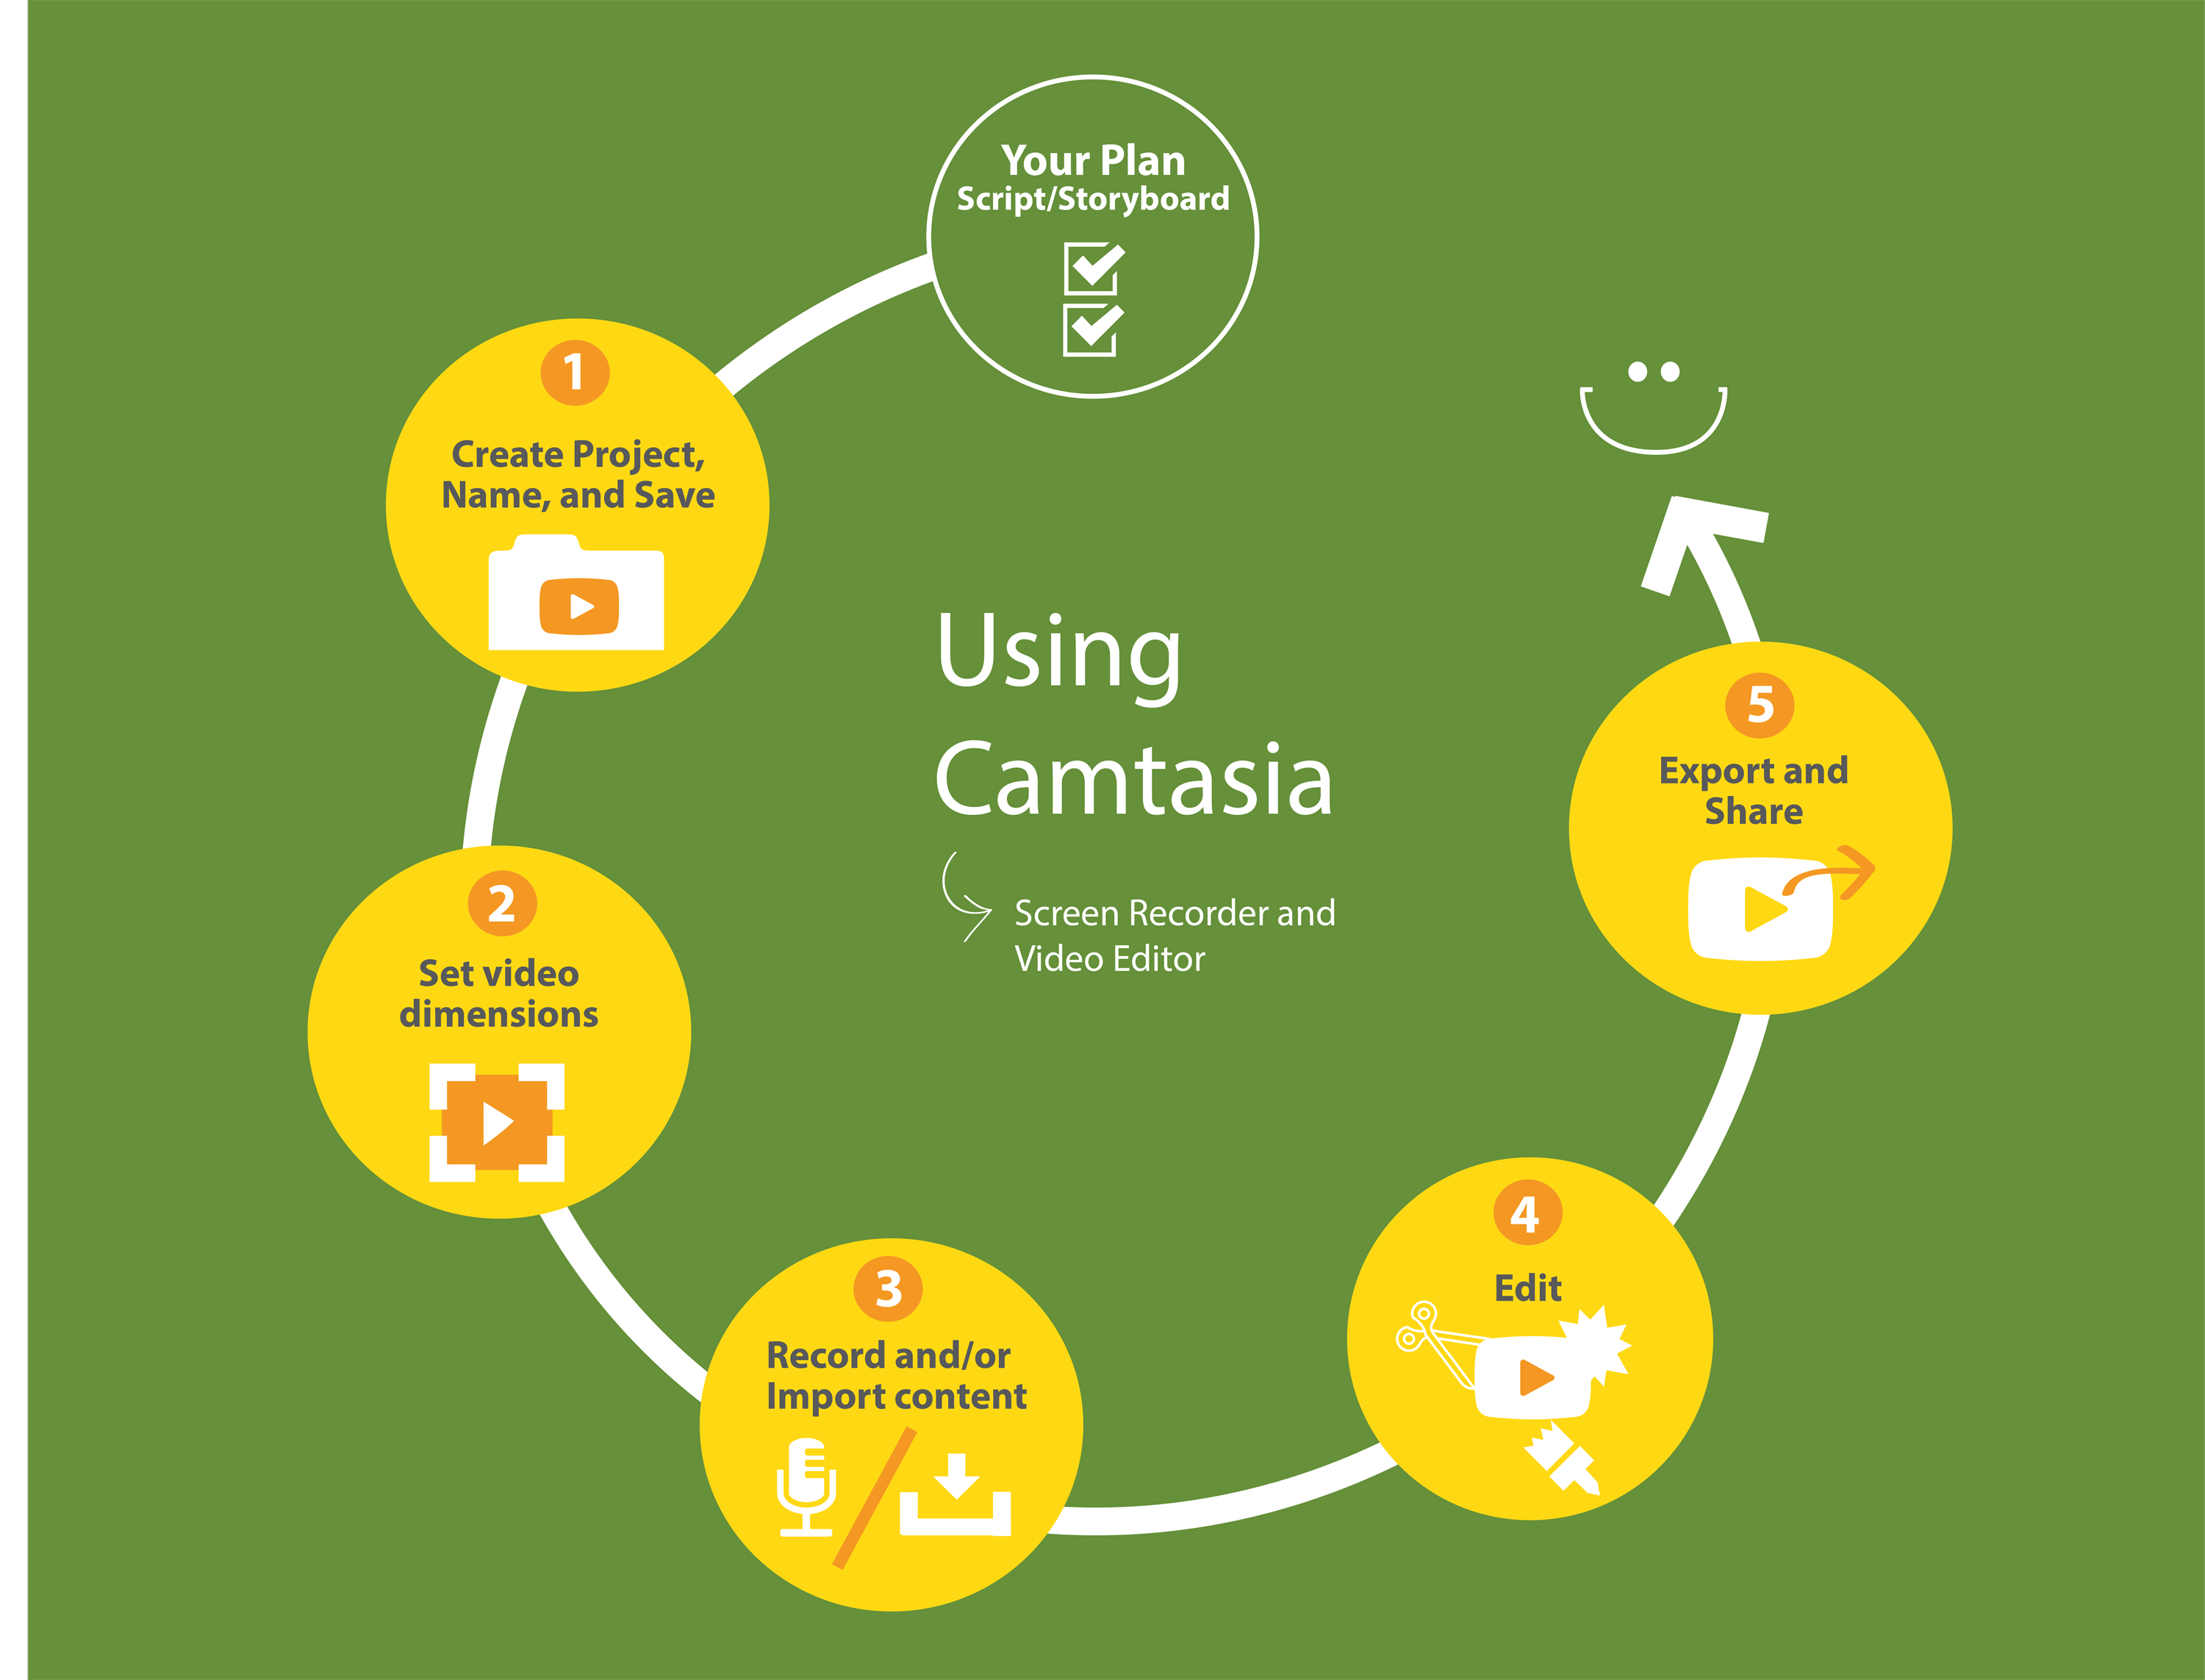
Step 1: Create Project, Name, and Save | ||
|---|---|---|
|
Before you do anything on your project in Camtasia, saving at the start allows you to be able to find it later. When you open Camtasia go to File > Save (for Mac) or File > Save Project (for Windows). Then select name and location. It is strongly recommended to name and save your project file in a folder. In this folder, also include any other media files you will use in your video so that everything is together in one place. Doing this first step allows you to keep organized with your project management and various files.
|
Step 2: Set Video Dimensions | ||
|---|---|---|
|
Setting your video dimensions before you begin editing ensures that the editing screen size is the same as the output. You want your editing size to equal your produced size.This allows you to avoid cases such as the black bar video syndrome. Here are some video tags strategies and other work-arounds to avoid black bar syndrome. Mac (Version 2) - Set Video Dimensions Tutorial
To ensure HD quality in Mac set the dimensions to YouTube HD 720p beside Preset. Windows (Version 8) - Set Video Dimensions Tutorial
To ensure HD quality in Windows remove the checkbox for Keep Aspect Ratio, and then set the width to 1280 and the height to 720.
|
Step 3: Record and/or Import Content | ||
|---|---|---|
|
Checkout Techsmith's Recording Tips as well as how to Record a Powerpoint or Keynote Presentation. Record Screencast
Import Video
|
Step 4: Edit | ||
|---|---|---|
|
Editing is the process of manipulating video footage files, media, audio files, and more. More specifically it typically can include adding special effects, pop-ups, splicing & moving around media files (video, audio, photos). Resources:
|
|
Exporting and Sharing for Mac (Version 2): Exporting and Sharing for Windows, Camtasia Studio (Version 8): Share to Hosting space:
|
When you record a video in Camtasia, noting these tips ahead of time will help you produce a better product:
1. Recording dimensions
- Record the screen in a larger size possible. By doing this, the quality of the your video will be retained when you upload to video server such as Kaltura, Cousera and YouTube.
- On tutorial on how to edit the video dimension of your recording, read or watch the tutorial by Techsmith for Mac and Windows.
2. Recording speed
- Talk slowly when you record the screencast. So that during the post-production, it will be easier for you to edit your voice.
- You do not have to re-take if you make a mistake during the recording. You can just pause for 10 seconds, correct your mistake and continue with the recordings. You will be able to edit out your mistakes in the post production process.
3. Recording "manageable chunks"

Instead of trying to record your entire powerpoint presentation in one attempt using Camtasia (which is virtually impossible as we all know and will take many attempts!), try recording one slide at a time. Each slide becomes an 'entity' all on its' own. You can then 'stitch' them together in Camtasia.
Lastly, you can insert a wrapper chunk(s) anywhere in your timeline. Wrappers can include:
- Guiding questions for students to consider when watching your video
- a self-assessment to take follow the conclusion of the video
- resources to extend learning further
- an opportunity to discuss or work with the content in some way (this may be your in-class activity)
Note: After you record your 'chunks' (i.e. slides), make sure you rename them accordingly (see image at right). This renaming will help you position the correct 'chunks' together on the timeline.
4. Record audio first, then drag other media onto timeline
Again, instead of trying to record your audio/video (i.e. tour of a webpage) together in one attempt using Camtasia, record your audio FIRST and save it. This way, the audio will have its' own timeline, separate from the video (and other media). Next, you can drag different media onto the timeline to align with your audio.
'
Note: Remember to adjust the setting to 'screen off", then hit the red record button to record just the audio.
5. Recording a powerpoint
When you record a PowerPoint lecture, keep the following tips in mind:
- Use a PowerPoint add-in. (Only available in Camtasia Studio 8) The PowerPoint add-in toolbar lets you record your PowerPoint easily. Watch this video by TechSmith: Record a PowerPoint Presentation
- Recording a PowerPoint in a widescreen: by default, your PowerPoint slides will have an aspect ratio of 4:3. When you record slides like that in Camtasia, and upload them to YouTube, you might see black bars on the sides of the video. To prevent this, you'll need to change your PowerPoint slides' aspect ratio to 16:9.
Changing the aspect ratio of PowerPoint slides on Windows
- Click on the Design tab, and select Slide Size.
- Click Widescreen (16:9)
Changing the aspect ratio of the PowerPoint slides on Mac
Watch this video by Techsmith: Record a PowerPoint or Keynote Presentation. The video has best practices and tips for recording PowerPoint presentations.
- In Microsoft PowerPoint, open the PowerPoint file that you want to change the aspect ratio of.
- Go to File>Page Setup
- Beside Slides sized for, select On-Screen Show (16:9) from the drop-down menu. Then press OK.
Camtasia's Interactive Functionality
Camtasia has Interactive Functionality to add quiz or interactive component and export as a SCORM . However, unfortunately by default, the quiz data will be sent to TechSmith server, Therefore, in order to be FIPPA compliant, avoid using the quiz/interactive functionality.
As an alternative, you can upload the video to Kaltura, and use the Kaltura quizzing function.
Tips to achieve the best quality
In most cases, you will be uploading a video to a video server(s). Such as YouTube and Kaltura. In order to achieve the best quality, check the video specification(or recommendation) for the video server that you are going to upload the video to. Then, adjust the export setting so that it matches with the video specification. See the list below to check the video specification for major video servers at UBC .
Video Specification for:
Kaltura
Sometimes when you export a video in Camtasia and upload it to Kaltura, the video quality is not as good as what you have expected. The reasons are because:
- By default, Camtasia will export video with variable video bitrate(data size of the video) so that it will allow Camtasia to export videos in lower file size with a decent video quality. However Kaltura interpret the video as low quality if the video bitrate is not high enough. This is why your video will look blurry on Kaltura even though your original video file is in a decent quality.
- On Kaltura, there are only 3 transcoding options which are: HD720p(high quality), SD540p(medium quality) and SD 360p(low quality). This means, if you upload a video with a lower-medium quality (which can be around 480p), then once you upload the video to Kaltura, the video will be degraded to SD 360p (Low quality).
The workaround for this is to export camtasia video file in higher bitrate so that the video file will be interpreted as HD720p Quality video in Kaltura. This documentation will show you how to export camtasia file into HD (High Definition) quality using Camtasia 2 (Mac version) and Camtasia Studio 8(Windows Version)
How to export a HD quality video in Camtasia 2 (Mac version)
The video above is a short sample video exported in HD quality. Follow the steps below to export Camtasia video in HD Quality:
Step1: Setting the canvas size

- Select the Canvas Zoom drop down
- Select Adjust Canvas. Beside the Preset, select YouTube HD 720p.
- Press Apply.
- Adjust the screen size.
You can follow the above steps by watching the screencast by Techsmith on: 4: Editing essentials: What You Really Need to Know
Step2: Export
- Click on Share, which is located on the top menu bar.
- Go to Advance Export
- Select Export to MP4, and click on Options
- Select the Image Size as 1280X720 HD
- Click Ok, and press Export.
How to export a HD quality video in Camtasia Studio 8 (Windows version)
The video above is a short sample video that is exported in HD quality using Camtasia Studio 8 (Windows).
Follow the steps below to export a video in HD Quality:
Step1: Setting the Canvas size
- Click on the Canvas Size option above the preview.
- set the width to 1280 and the height to 720.
- Adjust the screen size.

You can follow the above step by watching the Screencast by TechSmith: 04: Editing Dimensions and Saving
Step2: Export
- Click on File, and press Produce and Share.
- Select Add/Edit Preset. Then press New. You may set your preset name. (For Example: HD quality video)
- Under File Format, Select MP4- Flash/HTML 5 player.
- Select the Size tab. Under Video size, check Use editing dimensions
- Select the Video Setting tab. Set the Frame Rate to 30. Set the Encoding mode as Quality, then set the quality to more than 65%
- Click Next, and then select Finish.
- Select the Production Preset that you have just created (For Example: HD quality video)
- Press Next, and then click Finish.